

Message Automation is a powerful way to proactively engage with your website visitors and customers based on their behavior. By creating targeted rules, you can automatically trigger personalized messages to send at the perfect moment, helping you capture leads, guide users to the right pricing plans, and drive conversions without manual effort.
Accessing Message Automation
To configure these rules, follow these steps:
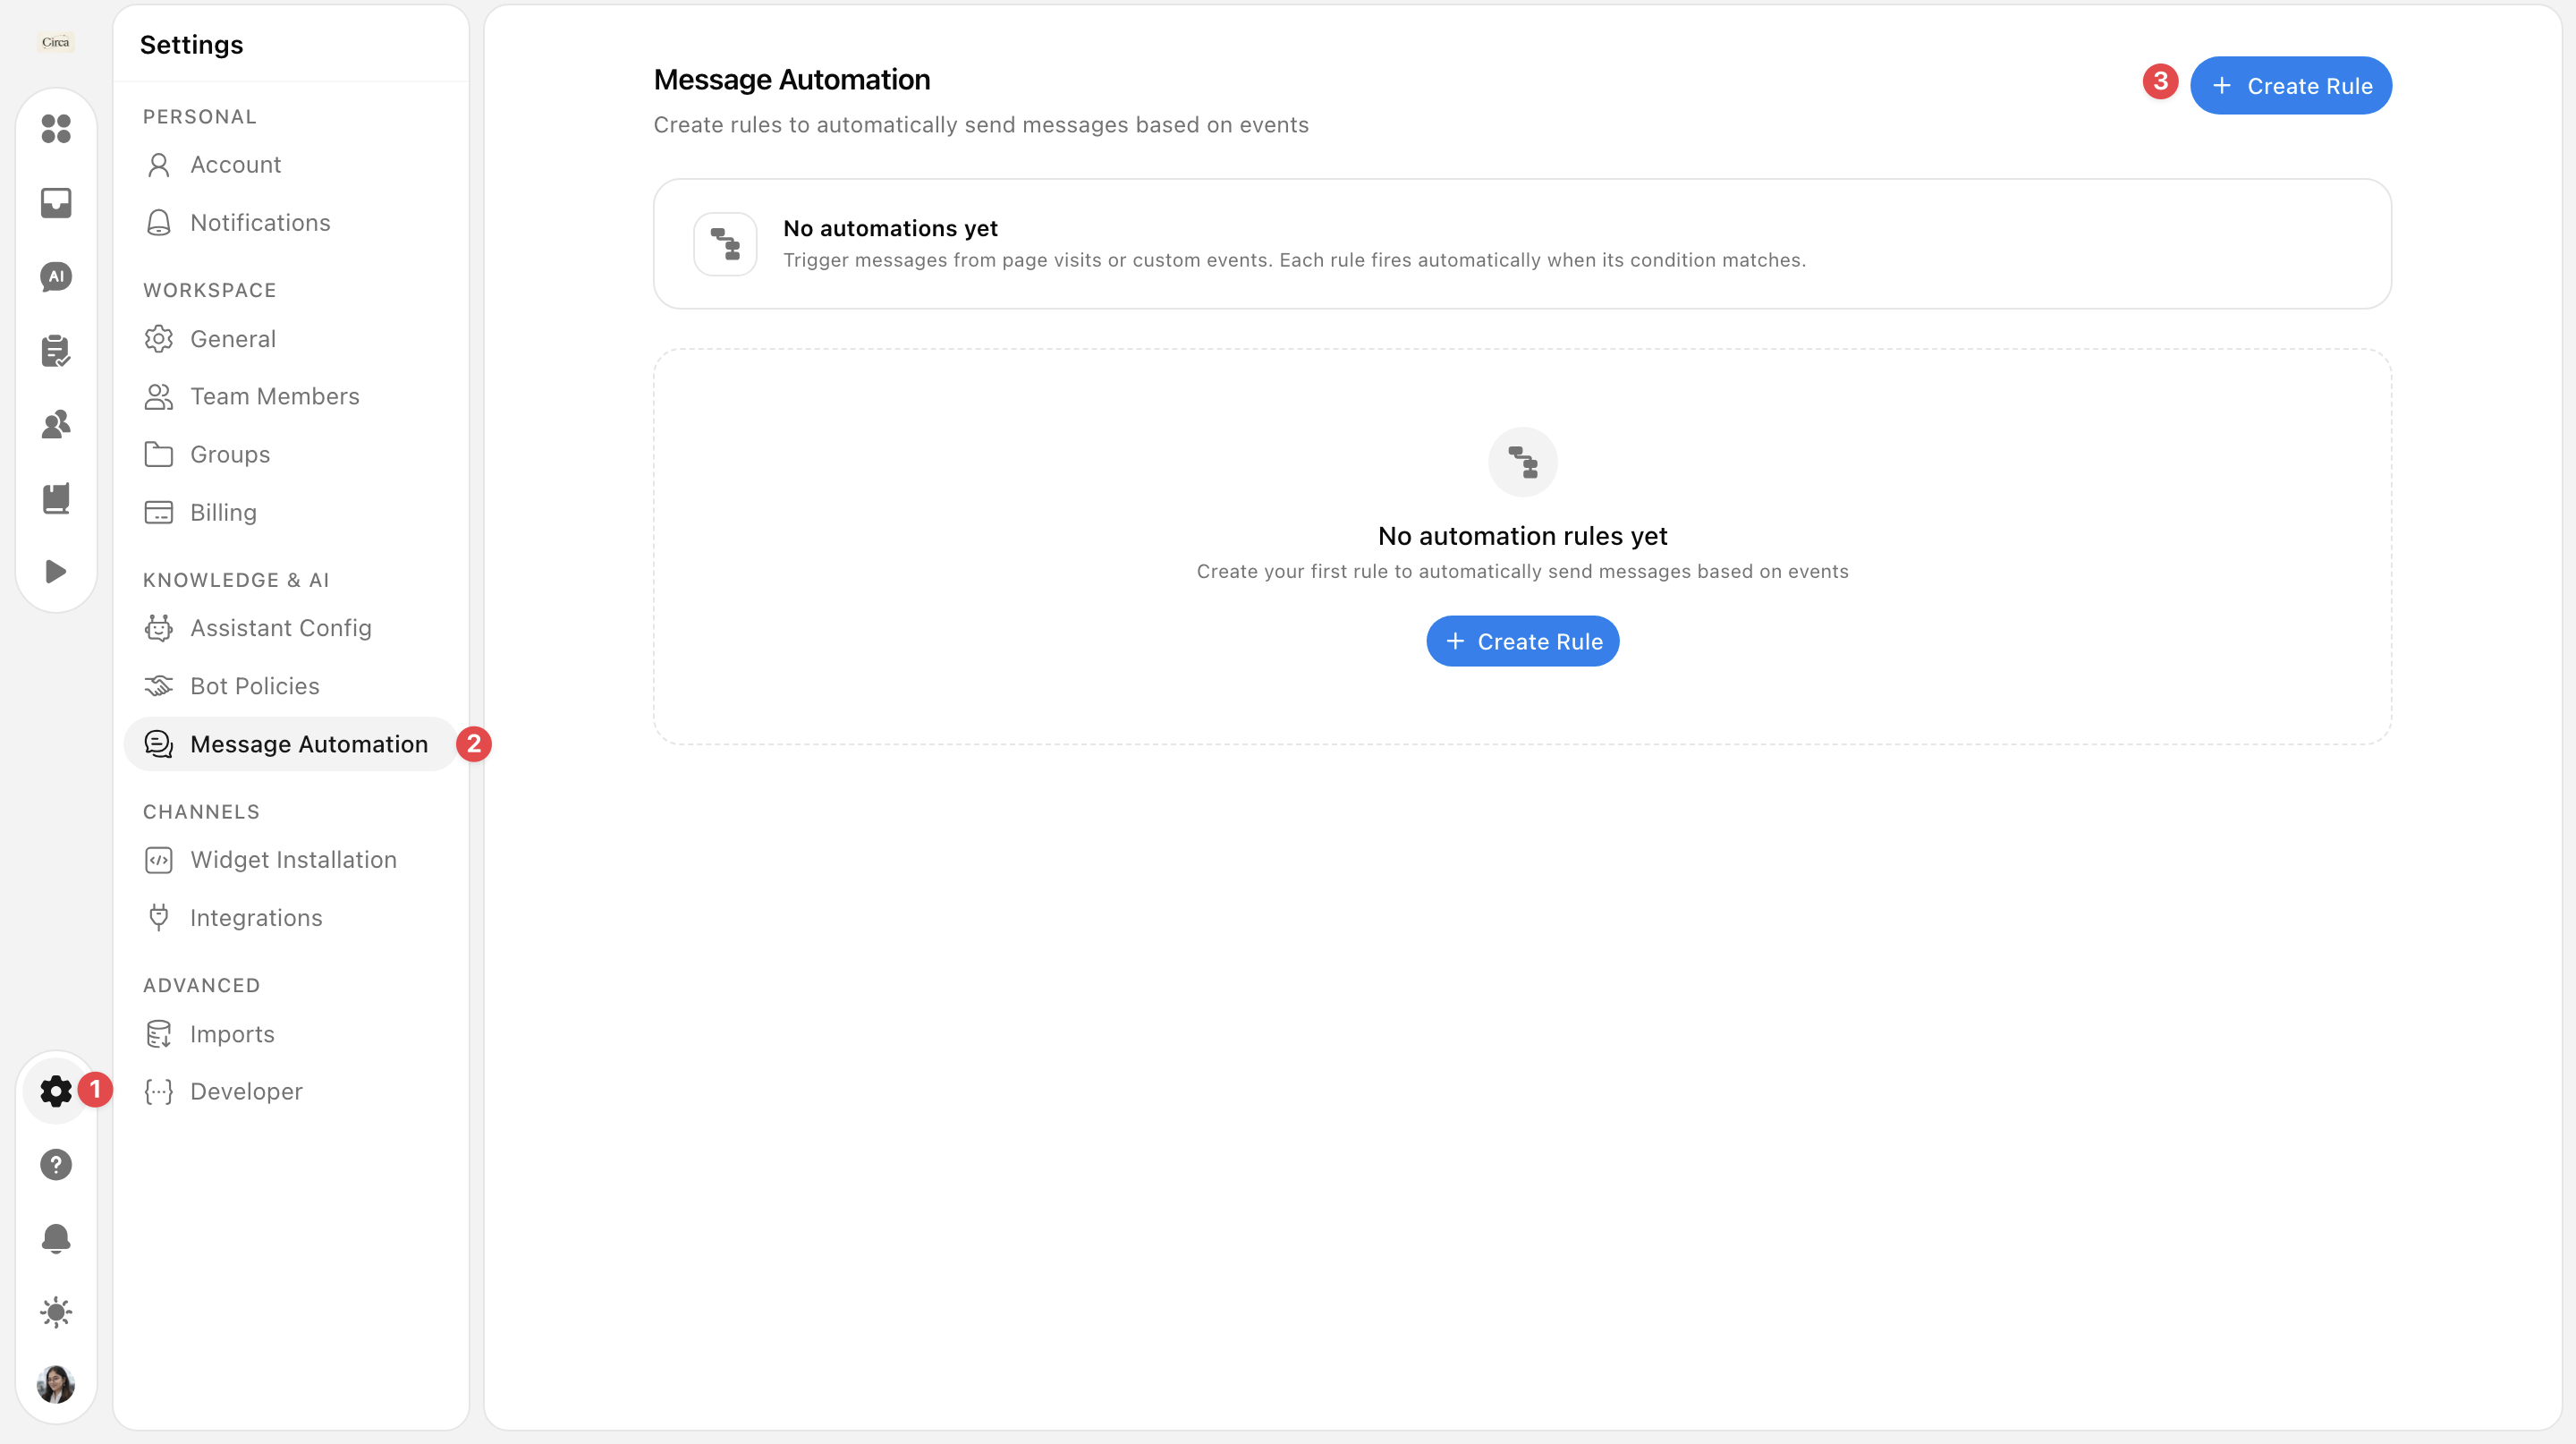
Log in to your SupportWire dashboard.
Click on Settings in the bottom left of the sidebar.
Under the Knowledge & AI section, select Message Automation.
Click on the Create Rule button in the top right corner to start building your new automation.
Understanding Automation Settings
The Message Automation page allows you to create, manage, and monitor automated outbound messages that trigger based on user behavior.
1. Creating a New Rule
Once you click the Create Rule button, a modal will appear where you can customize the fields to define exactly how and when your automation runs:
Event Types: Select the type of trigger for your message. Events are divided into two types:
Page View: Use this to trigger a message when a user visits a specific URL on your site (e.g., your
/pricingor/featurespage).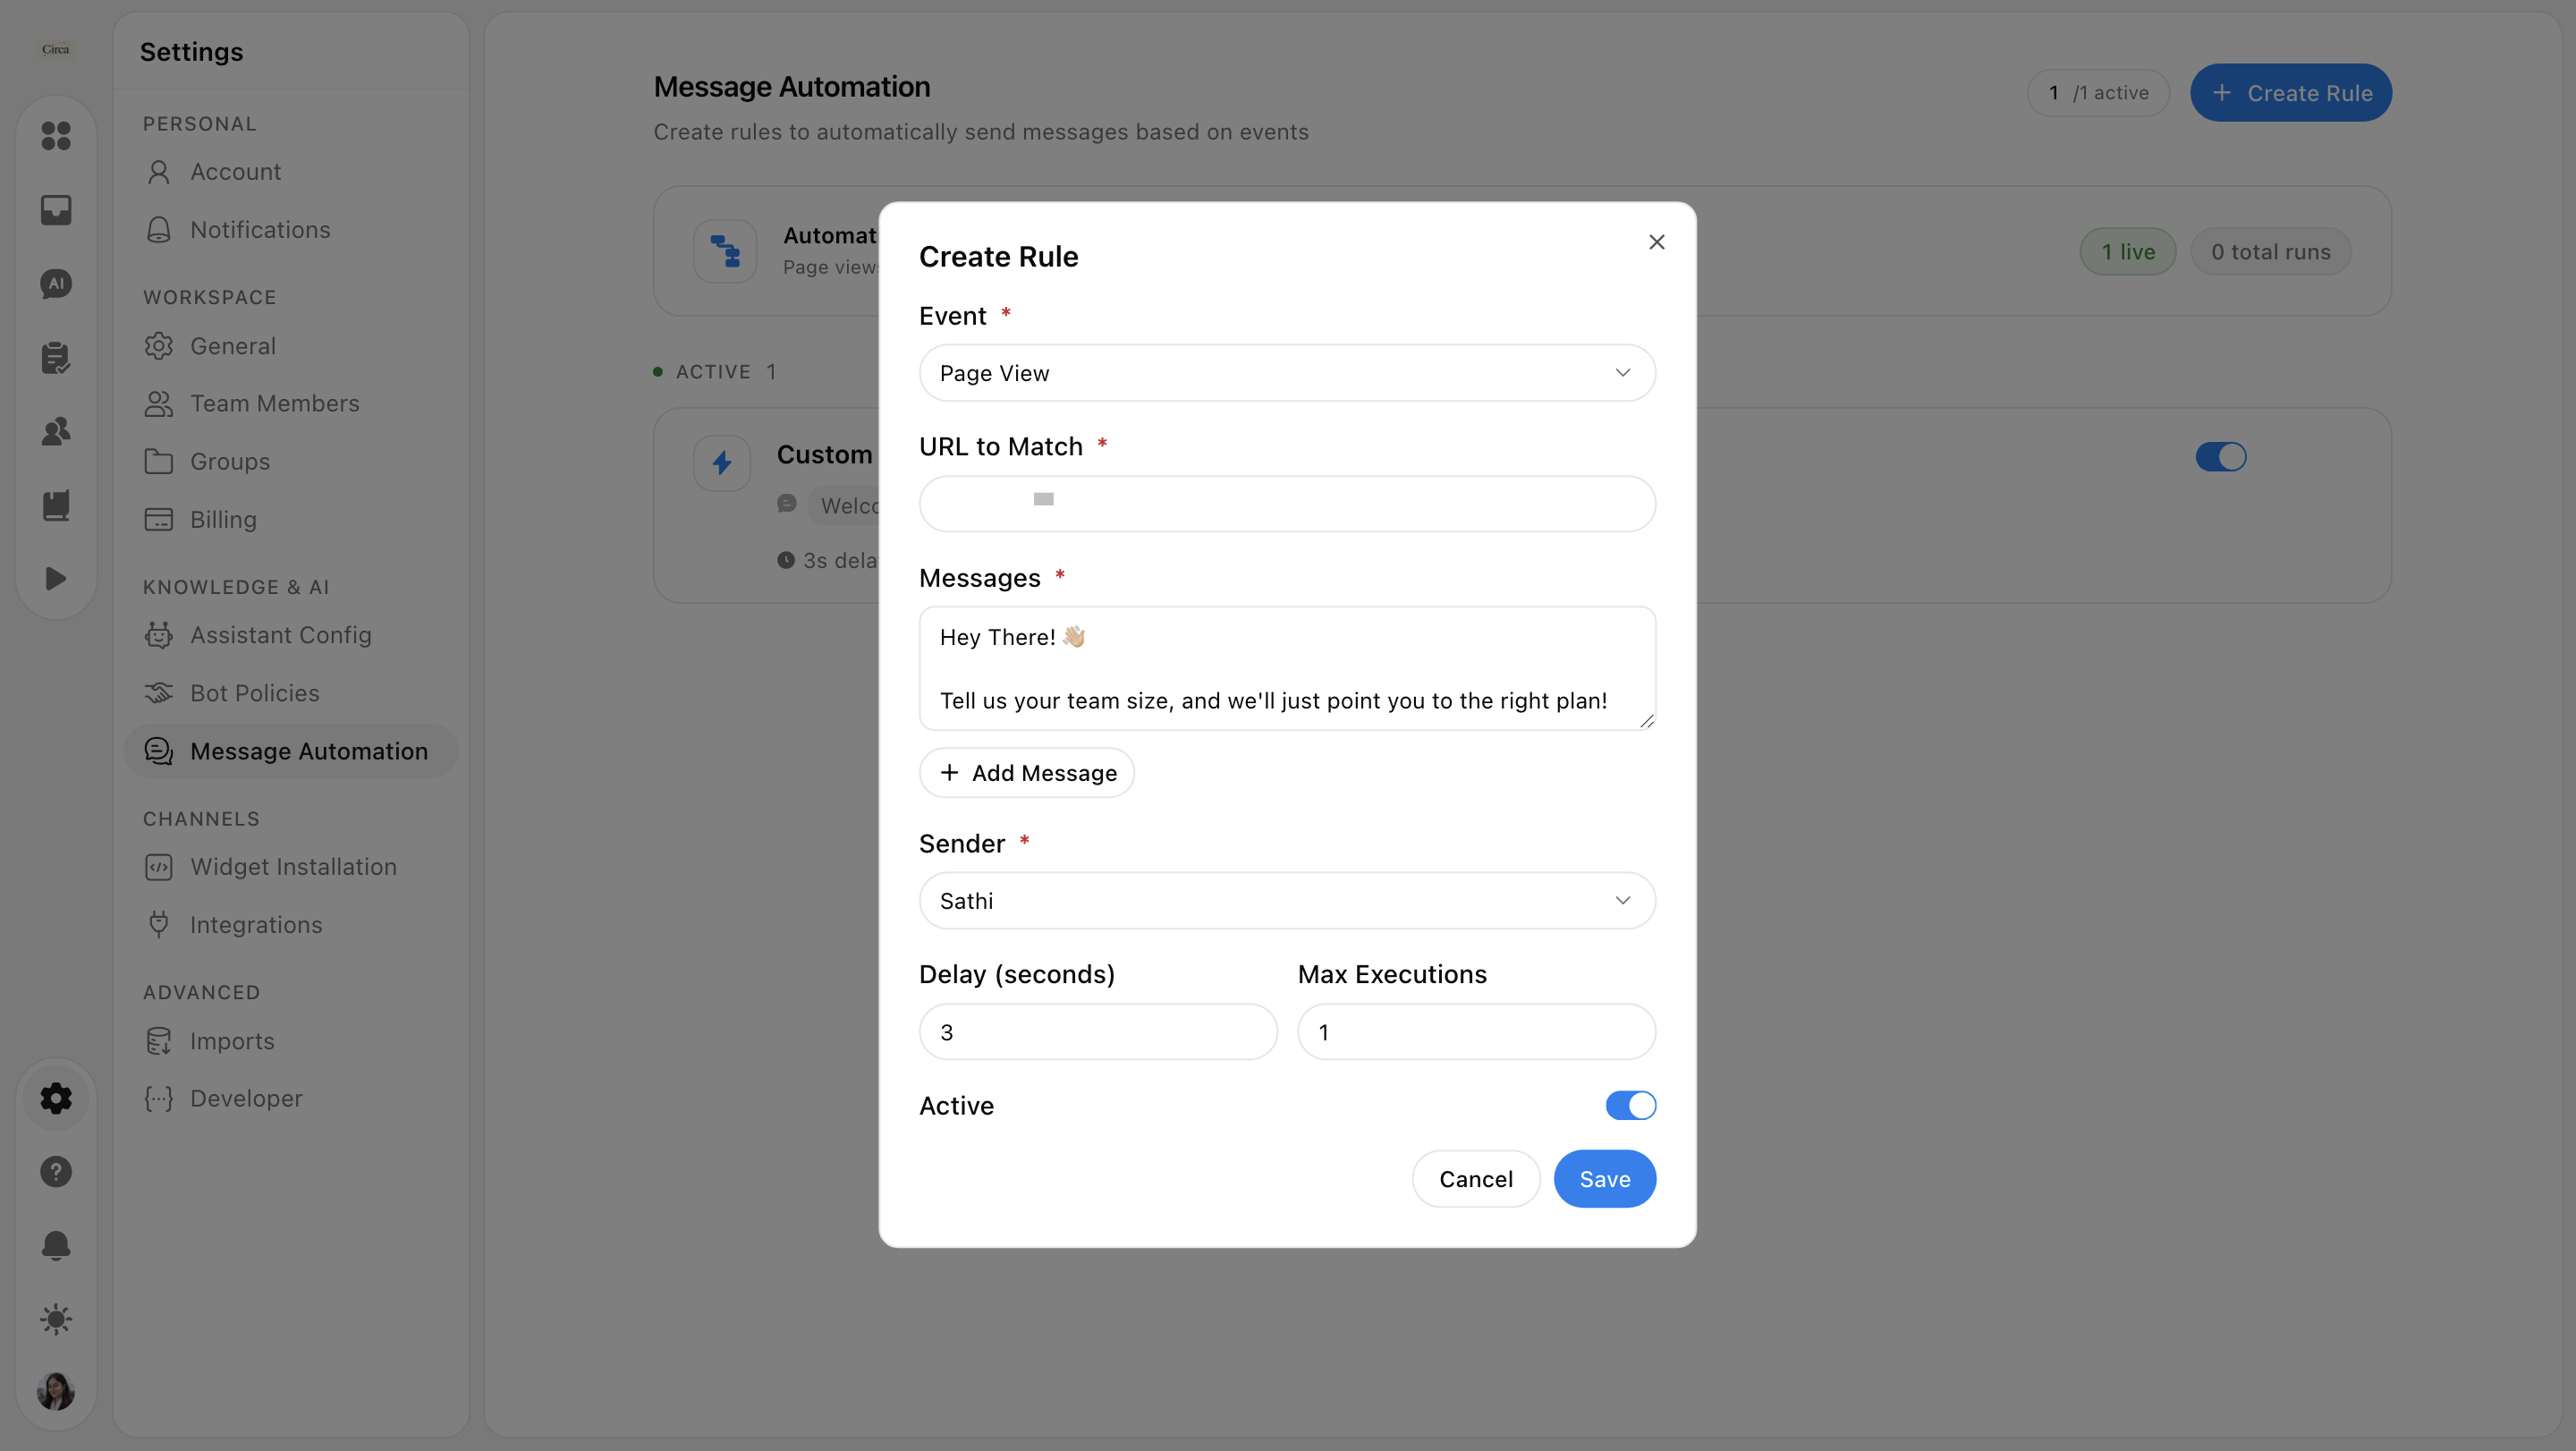
Custom Event: Use this to trigger messages based on unique actions users take within your app, such as clicking a specific button or completing a form.
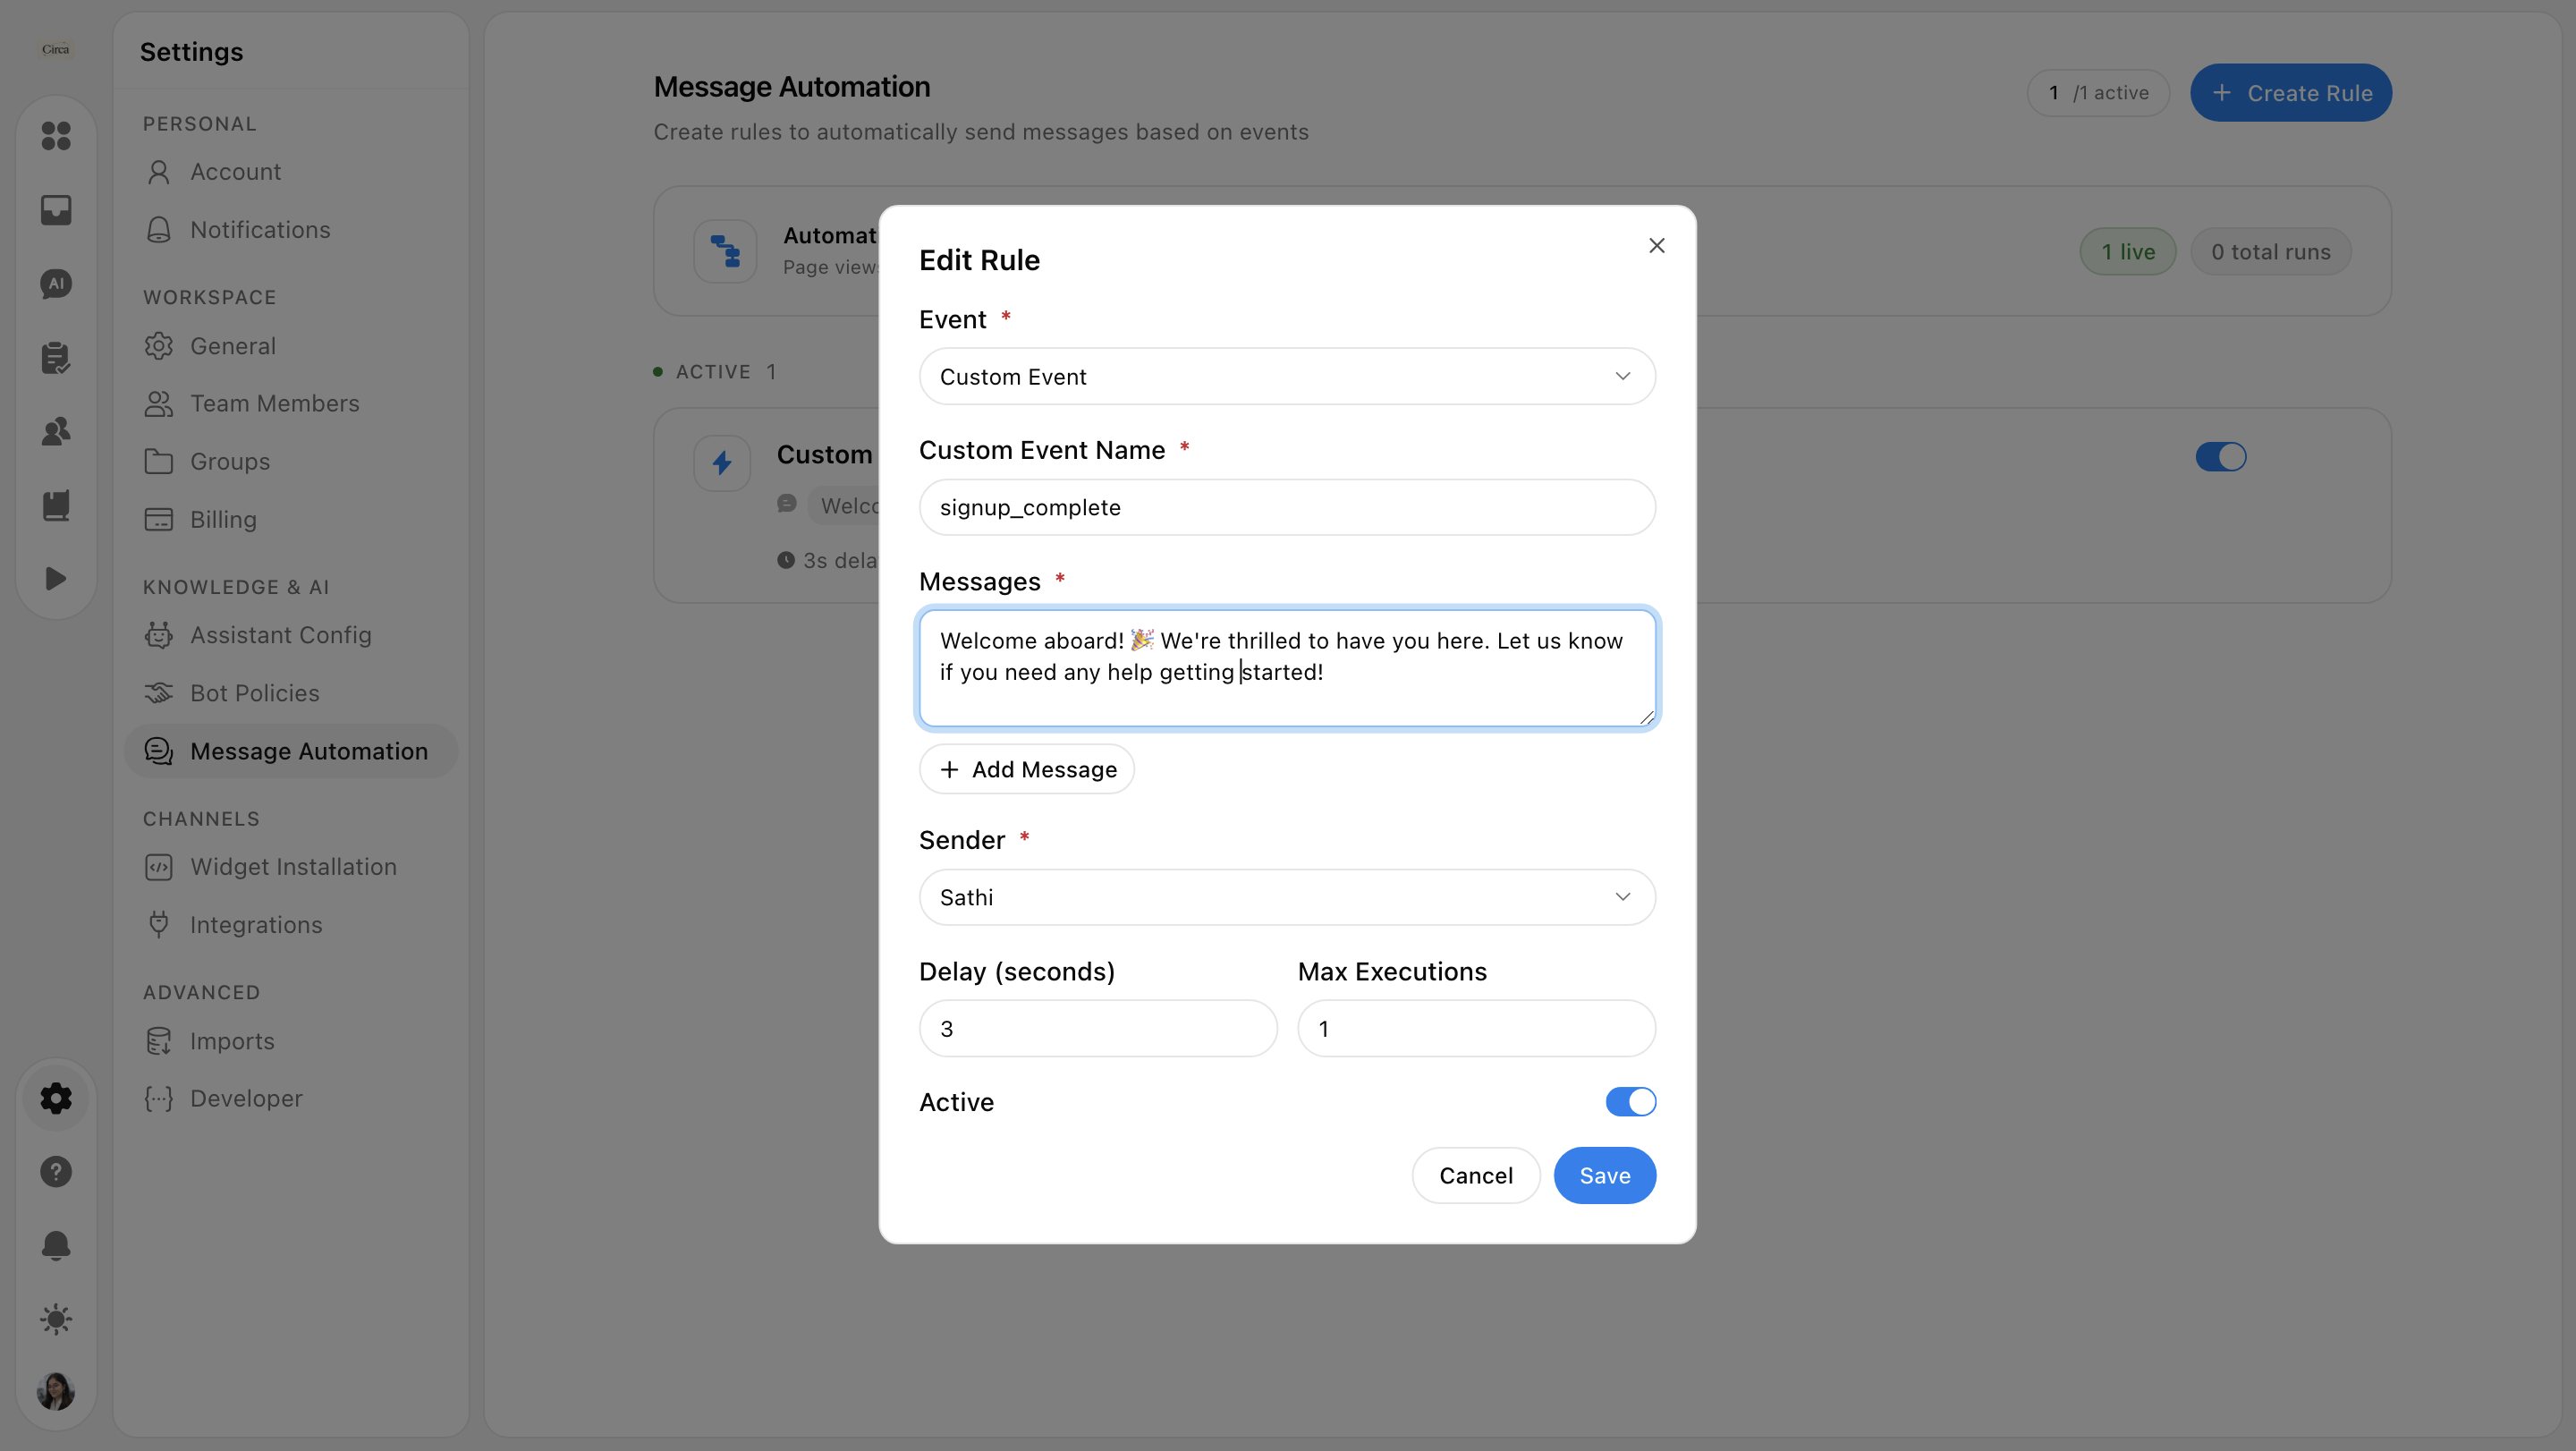
Messages: Write the message text you want your visitors to see. You can click Add Message to add multiple variations and rotate your greetings.
Sender: Select a specific team member from the dropdown. The automated message will appear to come directly from them, giving your automation a personal, human touch.
Delay (seconds): Set a specific time delay (e.g., 3 seconds) before the message pops up, ensuring the interaction feels natural and non-intrusive.
Max Executions: Control how many times this specific rule can run for an individual user. Leaving this empty means it will only trigger once per user.
Active Toggle: Switch this on to make your rule live immediately upon saving.
2. Managing Your Rules
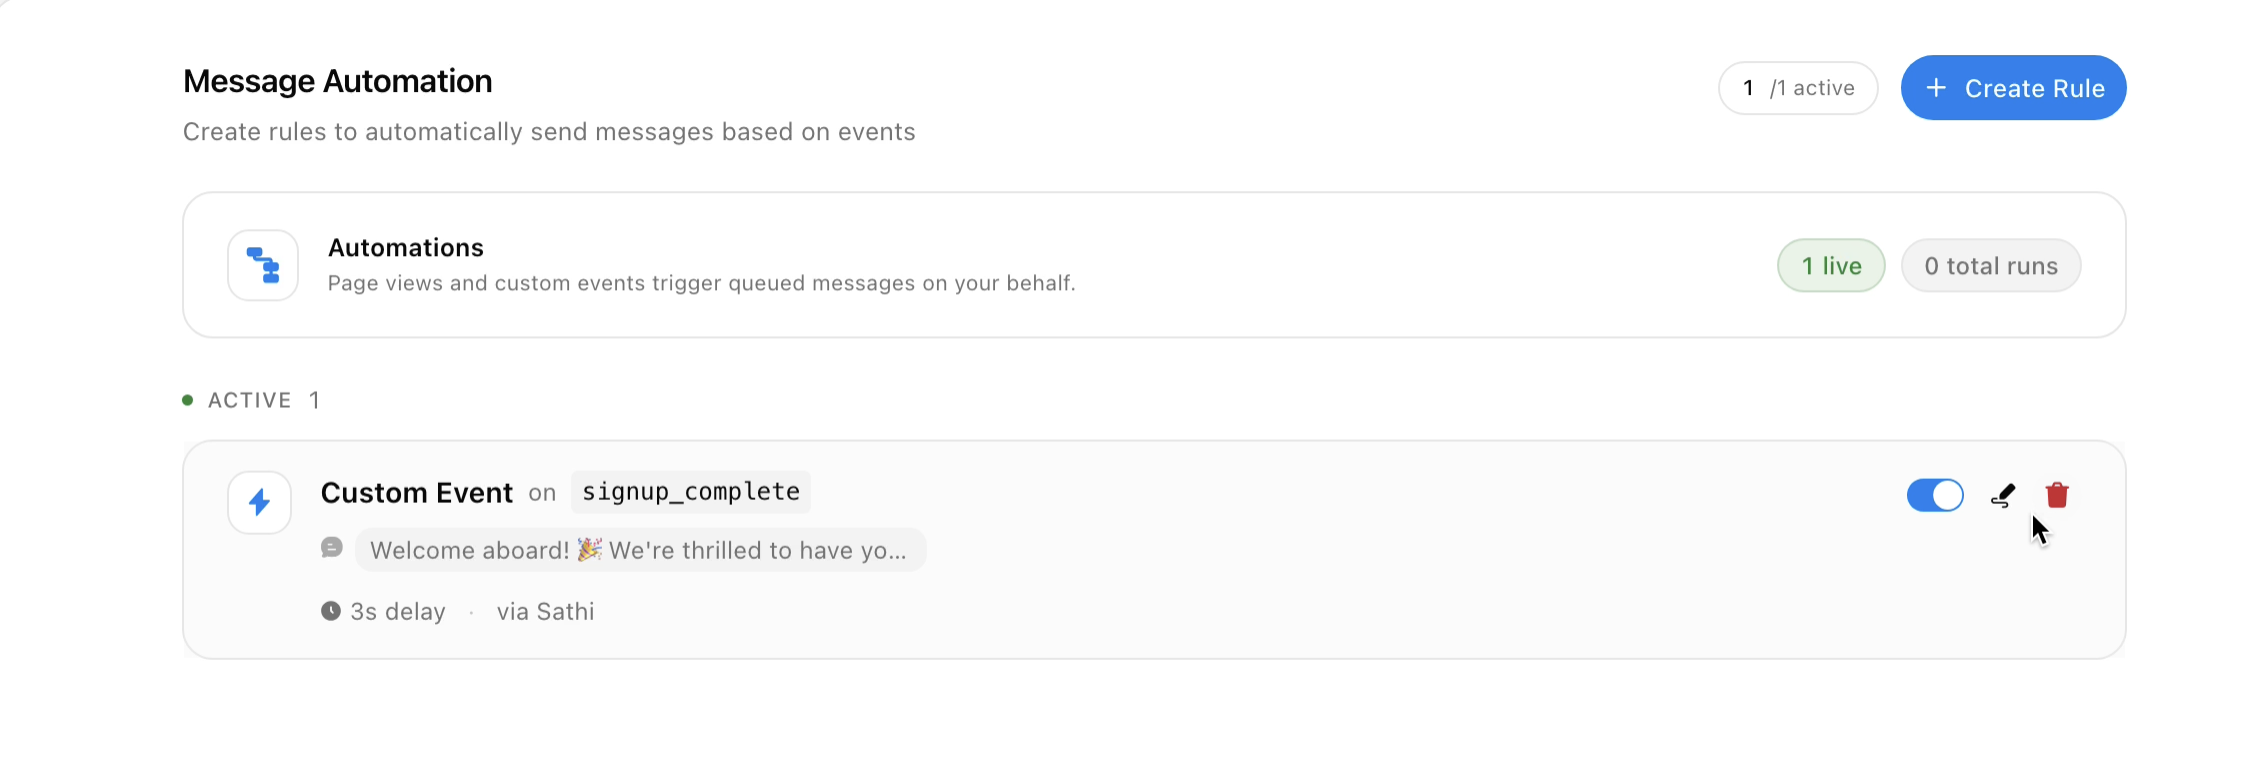
On the main Message Automation dashboard, you can track and control your live setups at a glance:
Active / Inactive Toggles: Quickly turn individual automation rules on or off using the status toggle next to each rule. This allows you to pause campaigns instantly without deleting your settings.
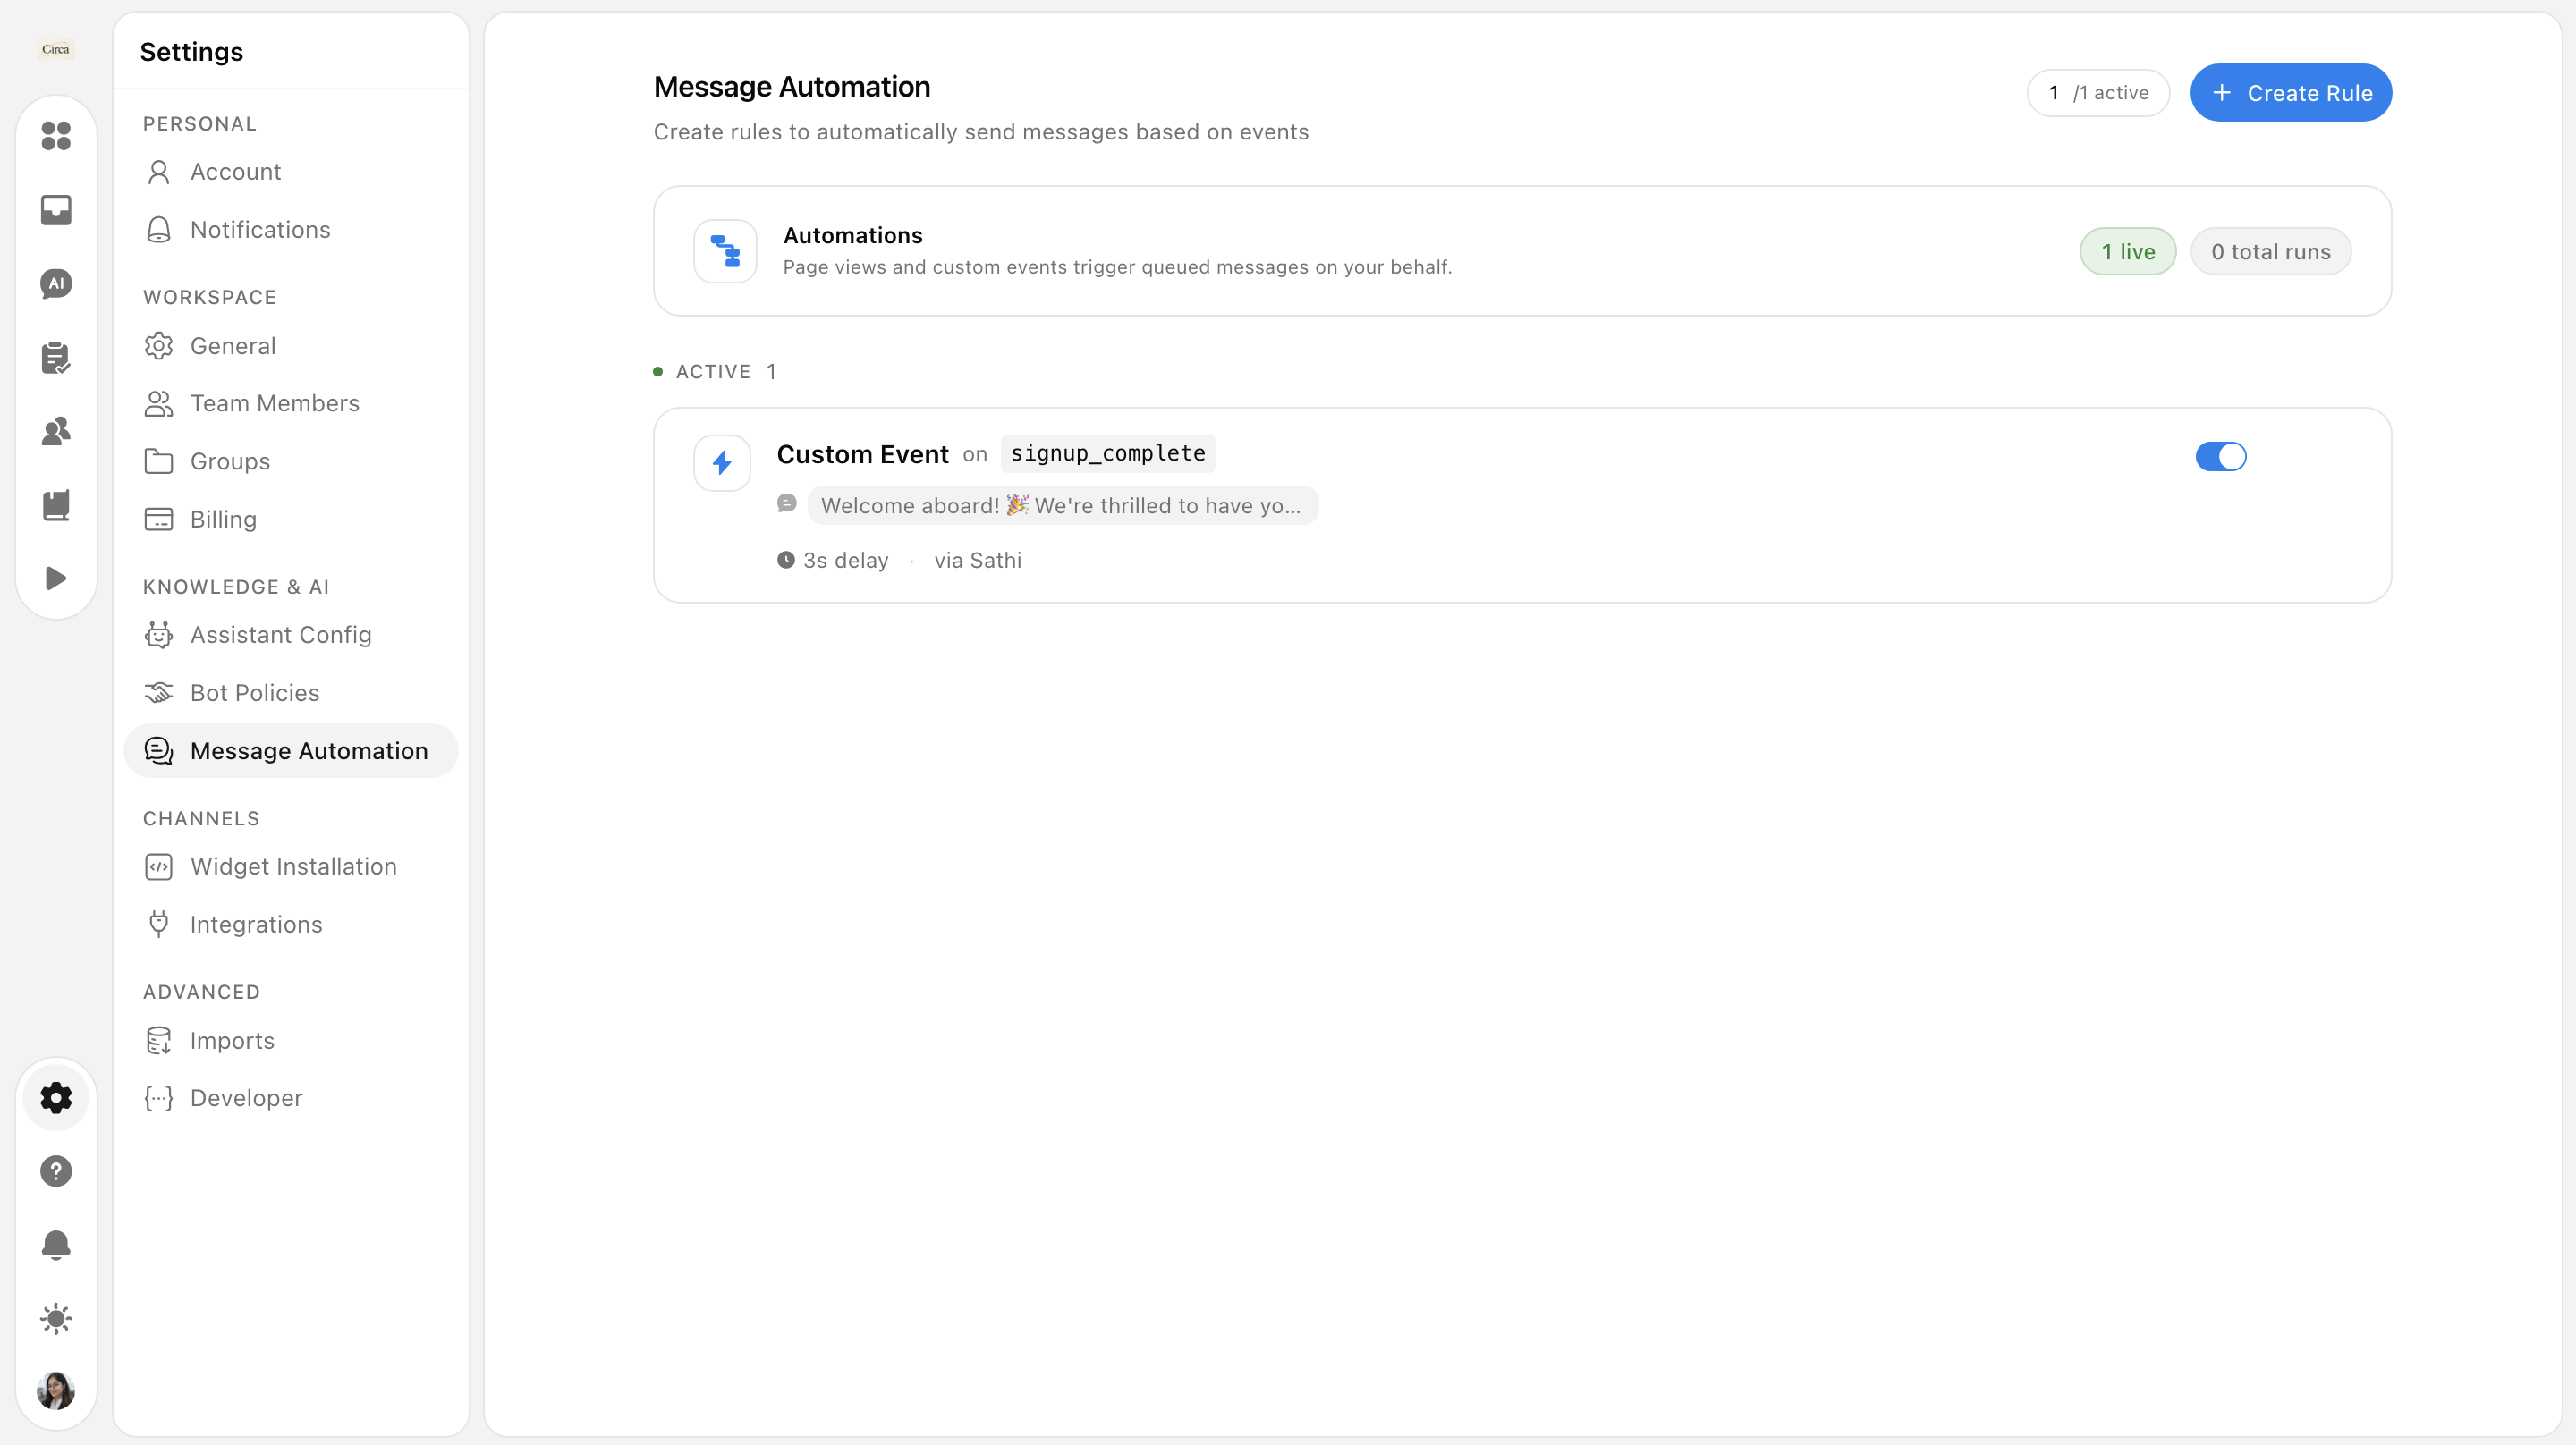
When you hover over the rule, the option to edit and delete appears. You can click the Pencil icon to update your settings or the Trash icon to remove the rule, and handle your automations accordingly.
Common Use Cases
Guiding Pricing Decisions: Set up a page-view trigger on your pricing page to ask users about their team size and automatically point them toward the right plan.
Onboarding Assistance: Trigger a helpful tips message when a user lands on a specific dashboard page for the first time.
Reducing Cart Abandonment: Engage users with a proactive offer or help message if they spend an extended amount of time on a checkout URL.
Need more help?
Reach out to our support at [email protected] or submit a request on our support board! 😃
Was this helpful?
Comments
You must be logged in to comment in this article.
Login to comment