

Workflows let you automate what happens to a conversation the moment it arrives. Instead of manually sorting, replying to, and routing every conversation, you build the rules once on a visual canvas, and SupportWire runs them for you.
How a Workflow is built
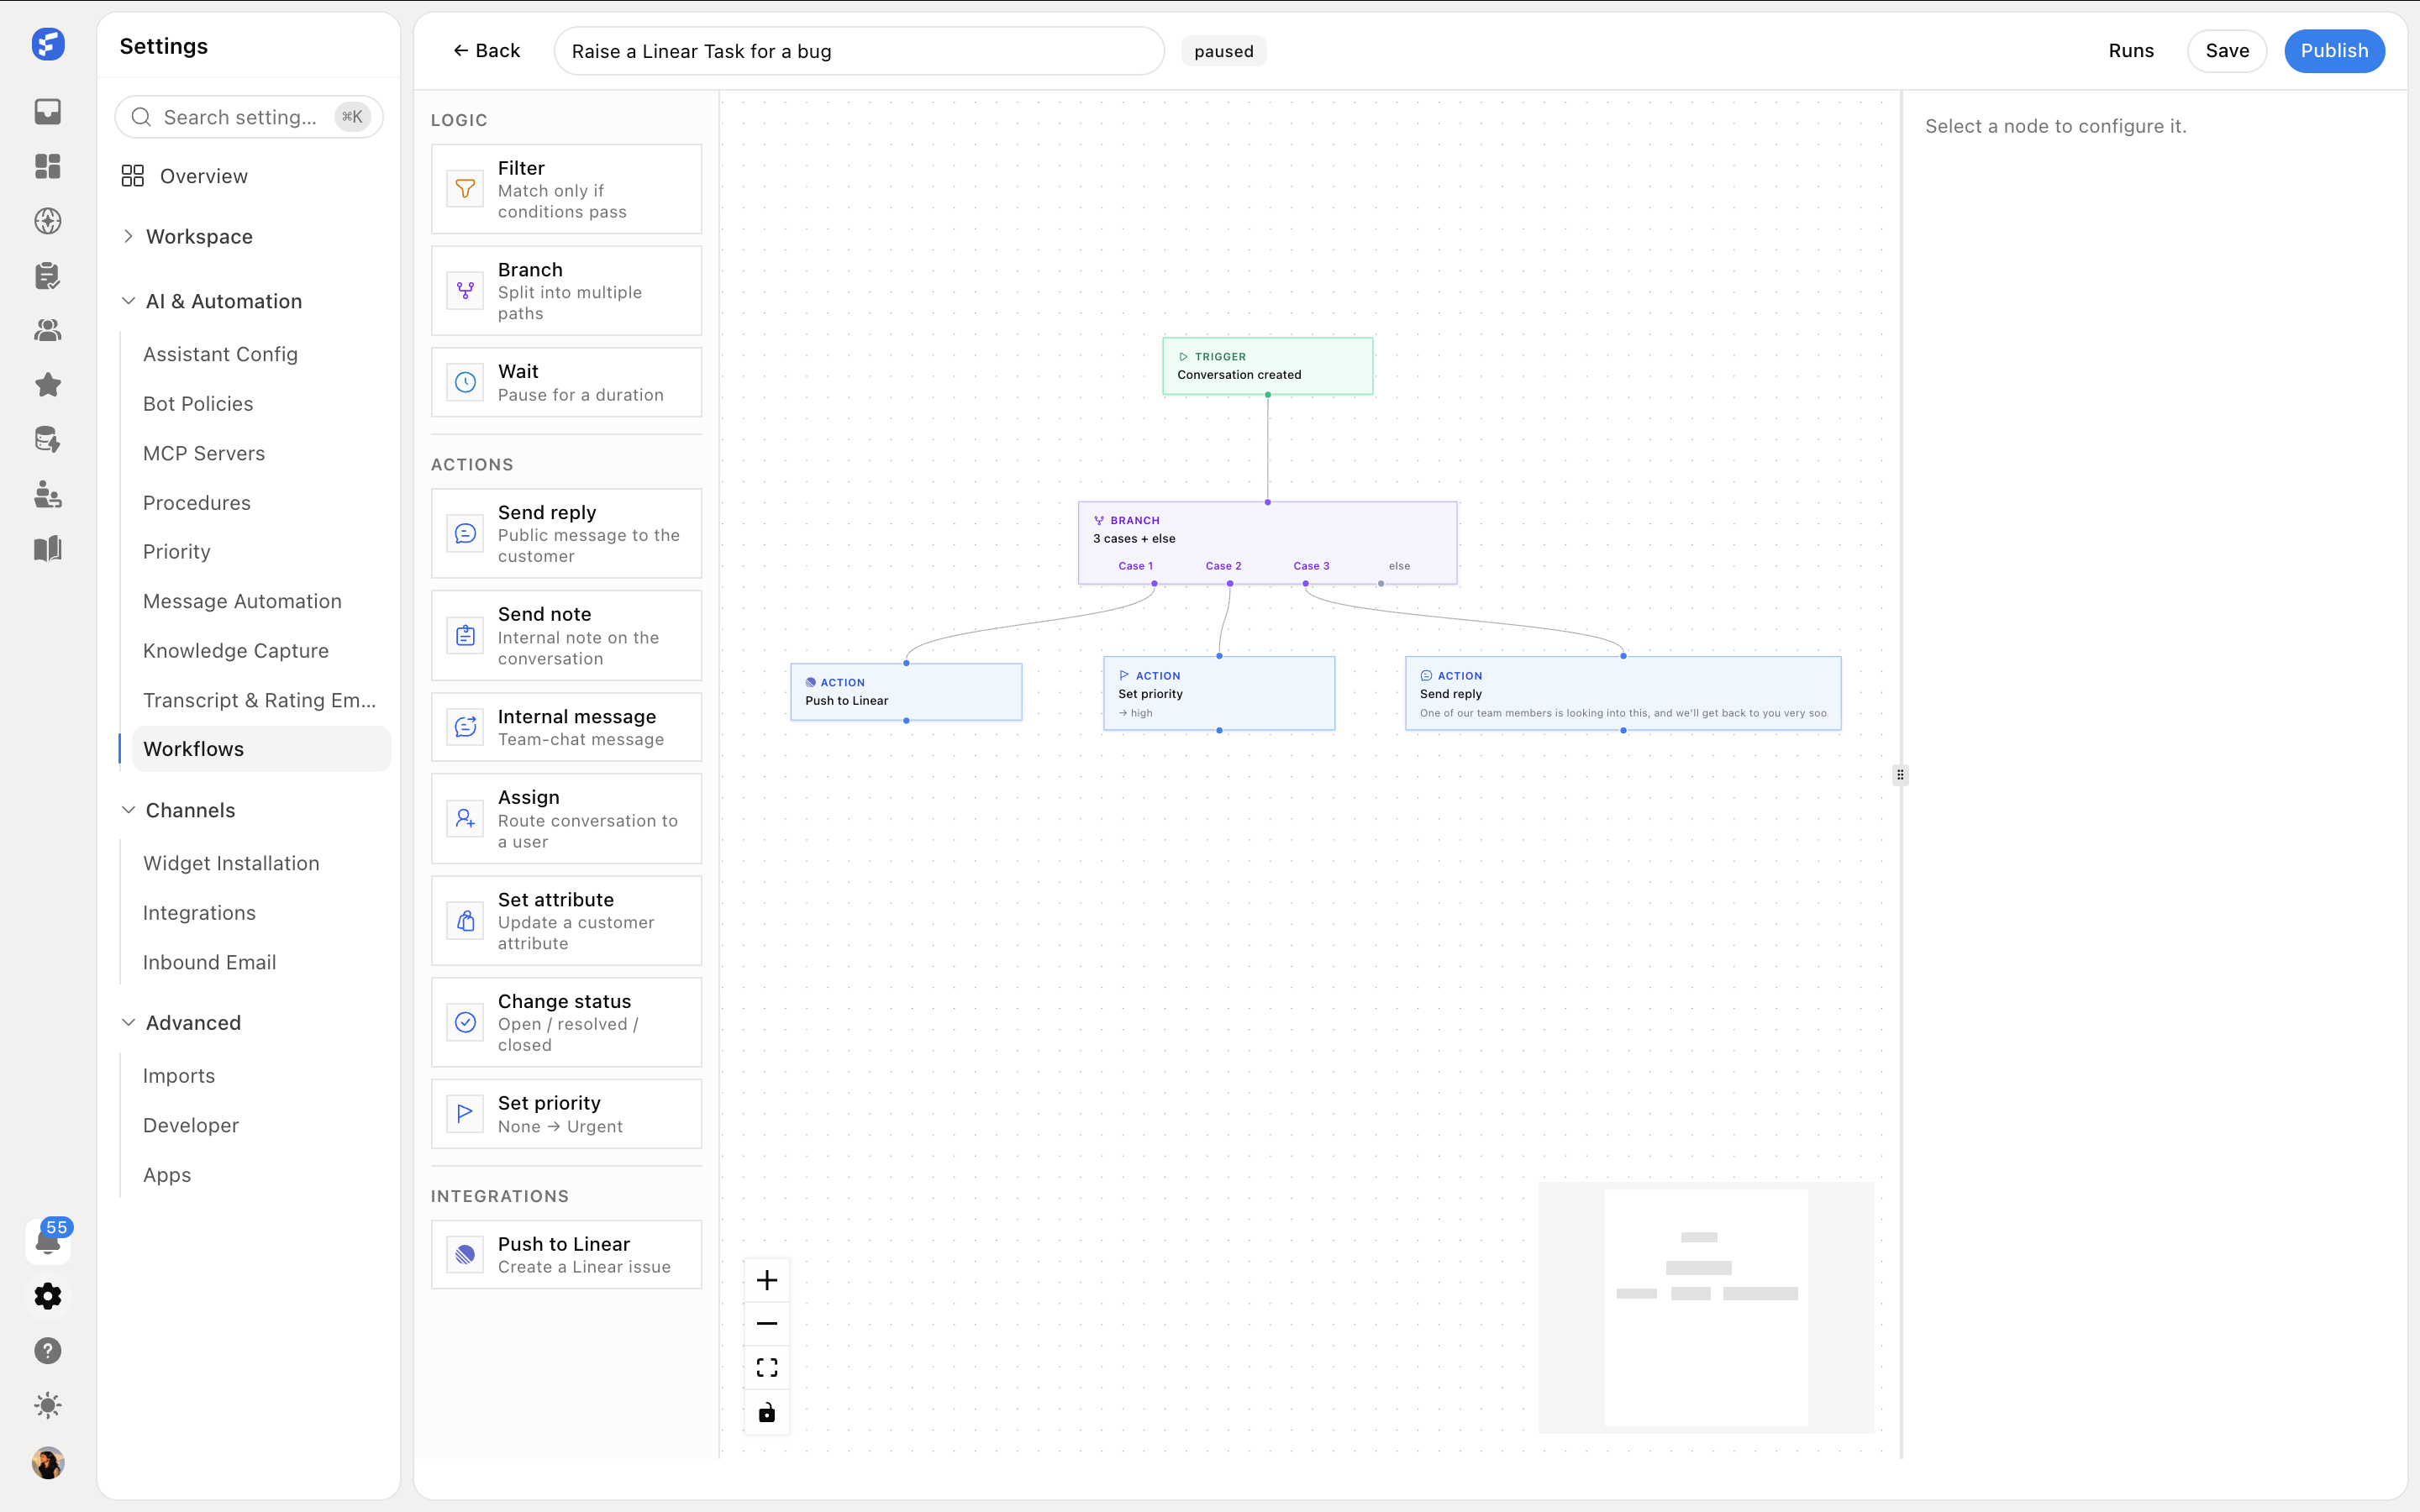
A Workflow is a set of nodes wired together on a canvas. Every Workflow starts with a trigger, then flows through any mix of logic, action, and integration nodes you drag in.
There are three kinds of nodes:
Logic nodes decide whether and where the flow continues: Filter, Branch, and Wait.
Action nodes do something to the conversation: Send reply, Send note, Send internal message, Assign, Set attribute, and Set priority.
Integration nodes reach into a connected tool: Push to Linear.
Creating a Workflow
Open Settings and go to Workflows.
Click New workflow in the top right.
Pick the trigger event, then click Next.
Give the Workflow a name and an optional description, then click Create workflow.
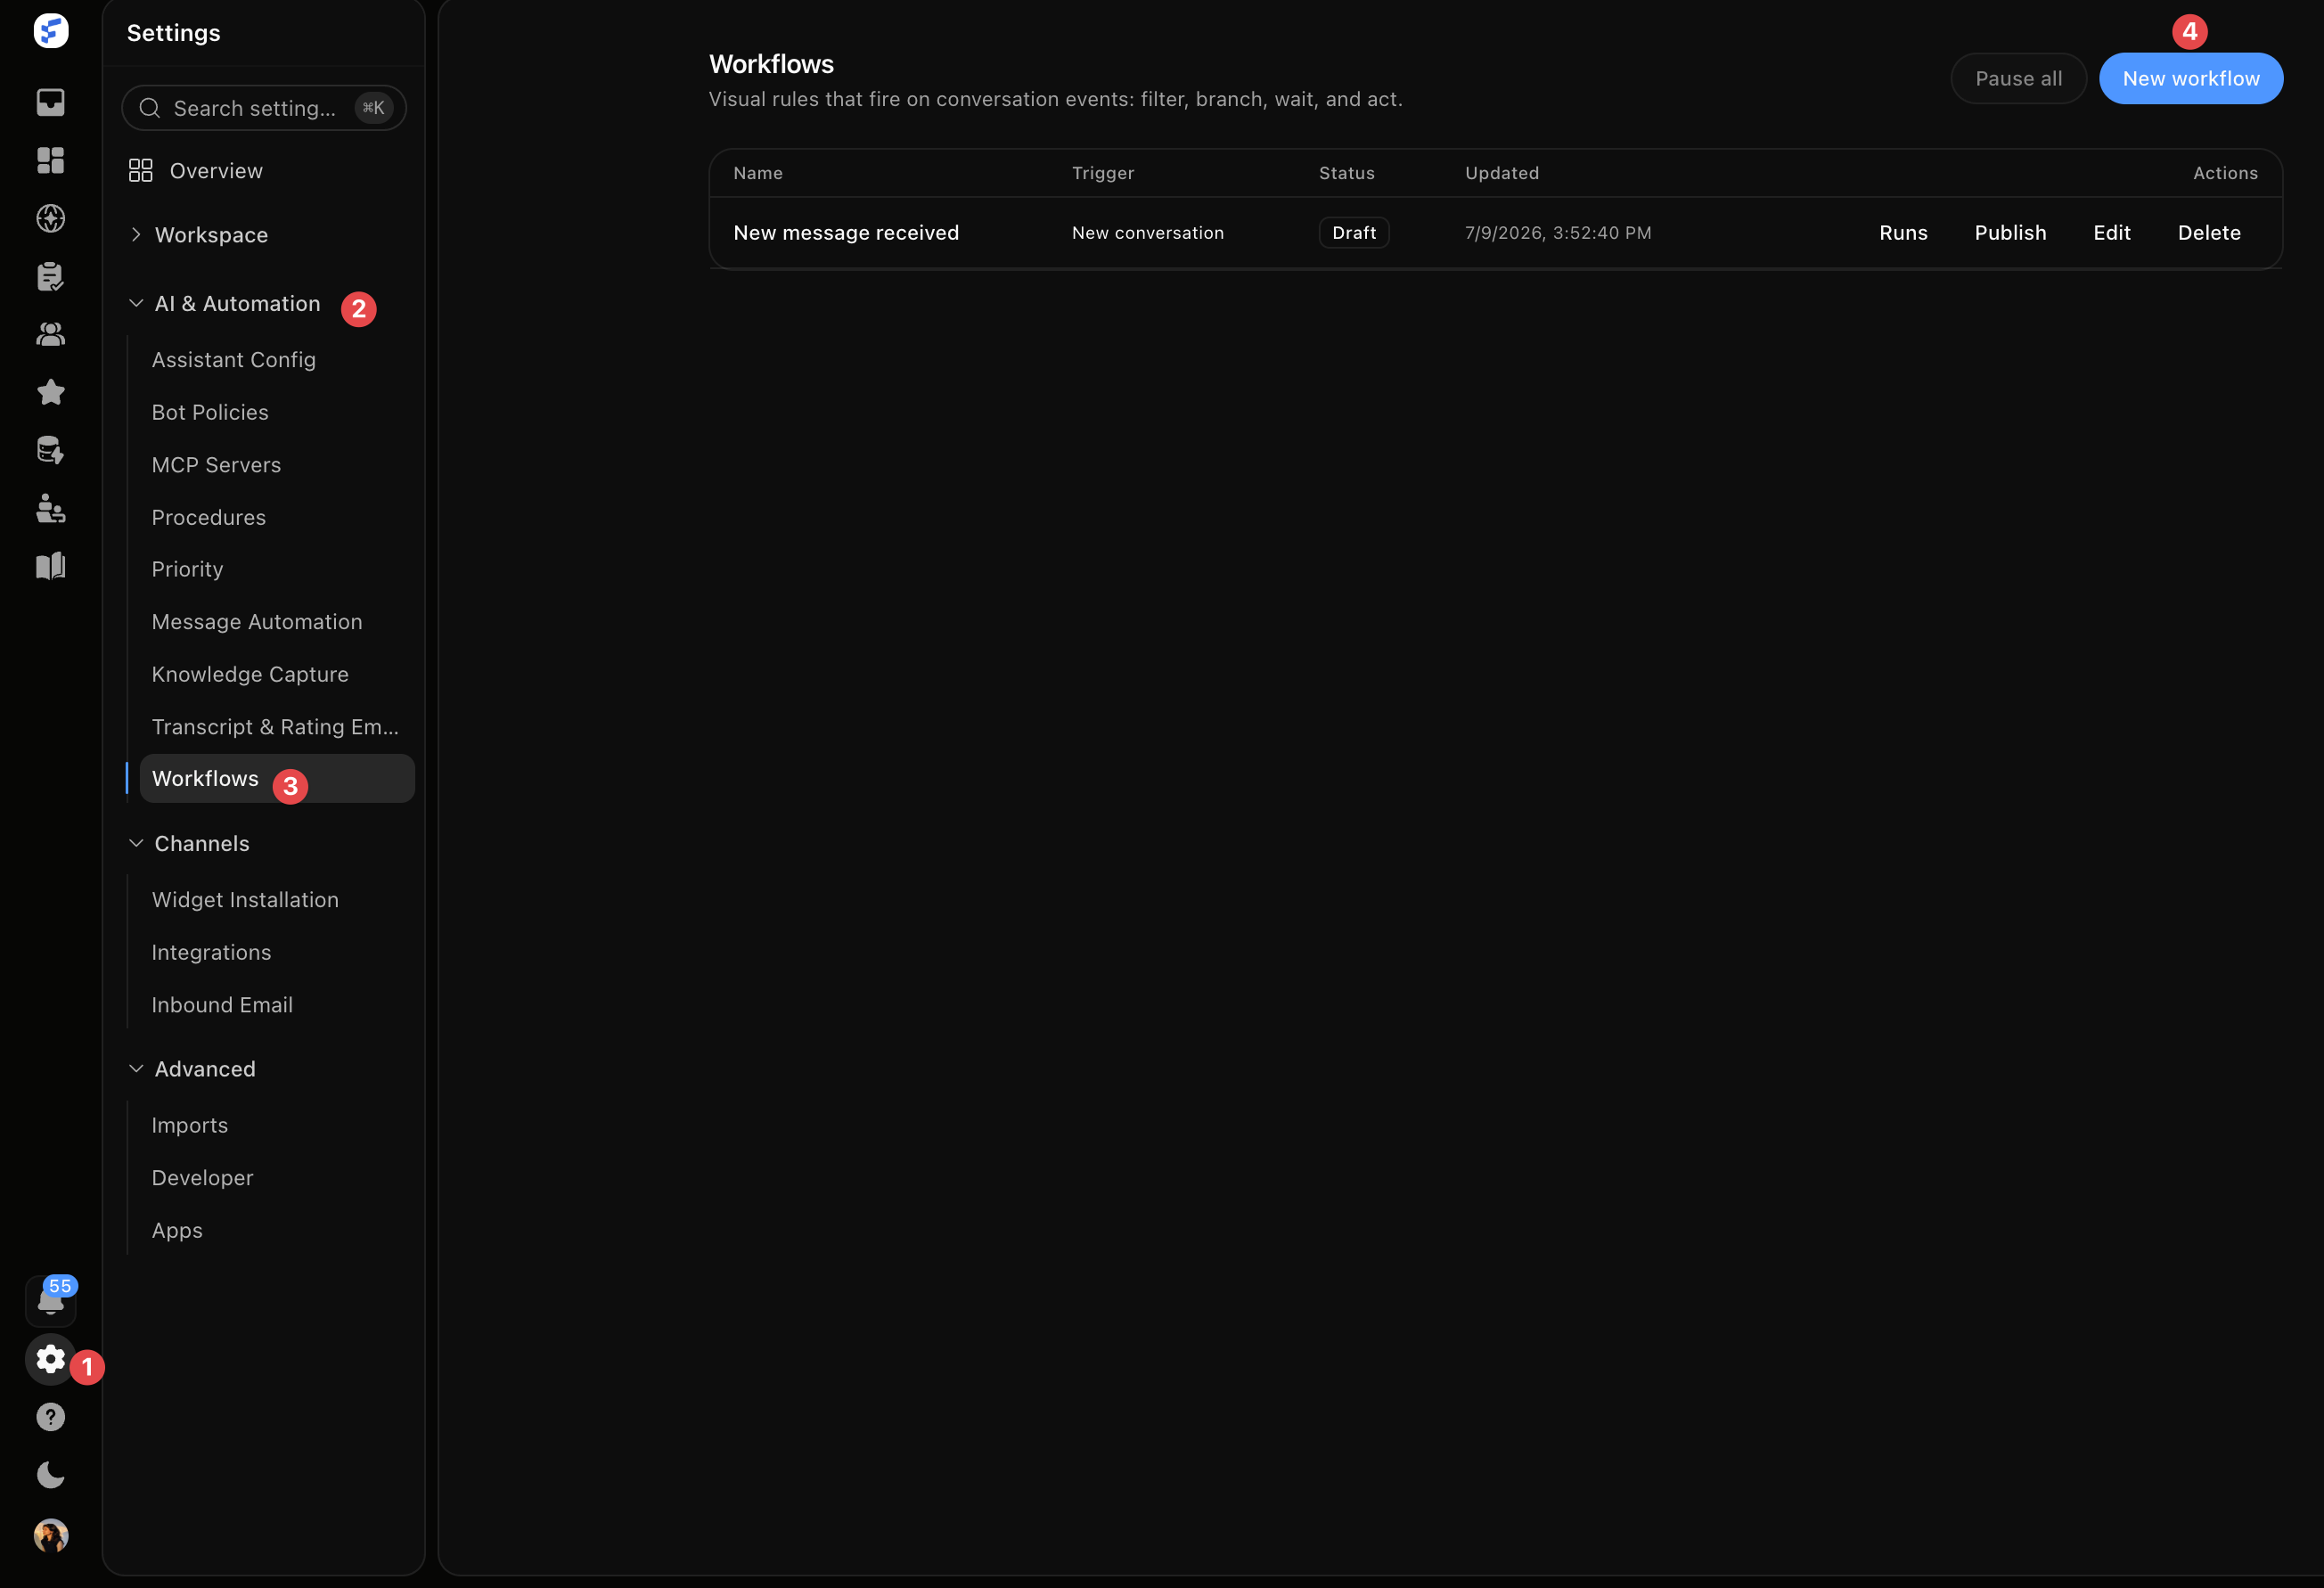
You land on the canvas with your trigger already placed. Drag nodes in from the left panel and wire them together. The Workflow stays in draft until you publish it. Use Save to keep your progress and Publish to make it live.
Choosing a trigger
The trigger decides when your Workflow runs. Pick one of five events:
New conversation fires the moment a customer starts a new conversation.
Customer sends a message fires on every inbound customer message in an existing conversation.
Customer goes inactive fires after a configurable idle period in an open conversation.
Widget opened fires when a customer opens the chat widget. It is rate-limited to once per day.
Bot hands off to agent fires when the AI bot escalates a conversation to a human agent.
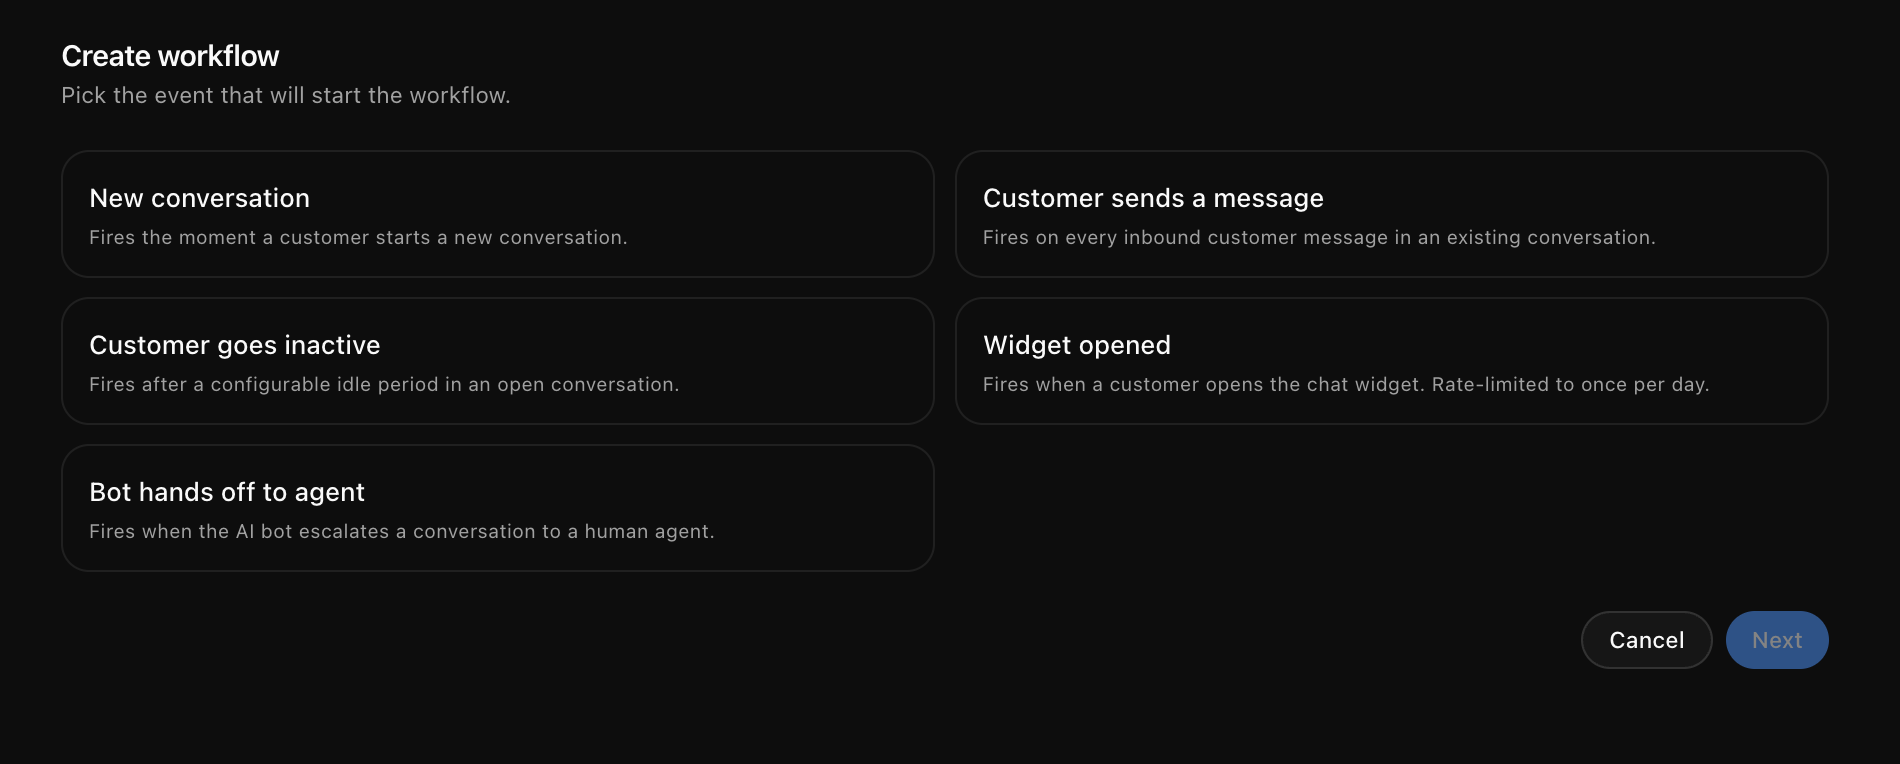
Most routing and assignment Workflows use New conversation. Use Bot hands off to agent when a rule should run only after Kal has tried and passed the conversation to a human, and Customer goes inactive for nudges or auto-close rules on stalled conversations.
Logic nodes
1. Filter
A Filter node lets the flow continue only when its conditions pass. Drop it in when you want the rest of the Workflow to run for some conversations and stop for the rest.
In the Filter panel, set Match to All or Any, then click + Add condition to add a rule, or + Add group to nest a set of conditions together. With no conditions set, the node reads "AND, 0 conditions" and passes everything through.
2. Branch
A Branch node splits the flow into multiple paths. It checks each routing rule top to bottom and takes the first match. If nothing matches, the conversation falls through to the else handle.
Each rule has an IF block of conditions and a GO TO case name. Click + Add routing rule to add another path. Wire each case handle and the else handle to whatever should happen next on the canvas. Like the Filter node, each rule matches on All or Any of its conditions.
Use Branch when one Workflow needs to send different conversations down different tracks, for example VIP customers to one path and everyone else to the else handle.
3. Wait
A Wait node pauses the flow for a set time before continuing. Set the Duration (seconds) value. It accepts anything from a few seconds up to 30 days.
Wait is useful for follow-up sequences: reply now, wait, then check whether the customer responded before doing anything else.
Action nodes
1. Send reply
Posts a public message to the customer. Type the message in the Message field. The sender defaults to the org's automation bot, or the first admin if no bot is set.
You can also add up to five Quick-reply buttons, tappable chips shown under the message. When a visitor taps one, its label is sent as their reply. Click + Add button to add one.
2. Send note
Adds an internal note on the conversation that the customer never sees. Type the note in the Message field. The sender follows the same default as Send reply.
3. Send internal message
Posts a message to your team's internal chat rather than onto the conversation. Type it in the Message field. Same sender default as the other message actions.
4. Assign
Routes the conversation to a teammate or a team. Set Target type to User, then paste the person's User ID (their UUID). Use this to send conversations straight to whoever owns that queue.
5. Set attribute
Writes a custom attribute onto the customer. Enter a Key, for exampleplan, and a Value, for example pro. Numbers and true / false are auto-detected as their real types; anything else is stored as text.
6. Set priority
Sets the conversation's priority. Choose the level from the Priority dropdown, for example High. Pair this with a Filter or Branch so urgent conversations get flagged automatically.
Integration nodes
1. Push to Linear
Creates a Linear issue from the conversation. Optionally choose a Target Team and Target Project. Leave both blank to use the integration's default target. This is handy for turning bug reports that land in support into tracked engineering work without leaving SupportWire.
Publishing and managing Workflows
Once the canvas looks right, click Publish to make the Workflow live. Use Runs to see each time the Workflow has fired, which is the fastest way to confirm it is behaving.
You can pause a live Workflow at any time without deleting it, and the Pause all control on the Workflows list stops everything at once, which is useful during a busy period or while testing a change.
Need more help?
Reach out to our support at [email protected] or submit feedback on our board!
Was this helpful?
Comments
You must be logged in to comment in this article.
Login to comment