

Groups are a powerful way to organize your support conversations, route queries to the right team members, and create public chat links. By grouping your conversations by department or function (such as Sales, Support, or Billing), you can streamline your workspace workflow and ensure customers always connect with the right experts.
Accessing Groups
To manage or create new groups, follow these steps:
Log in to your SupportWire dashboard.
Click on the Settings gear icon in the bottom left of the sidebar.
Under the Workspace section, select Groups.
Click on the New group button in the top right corner.
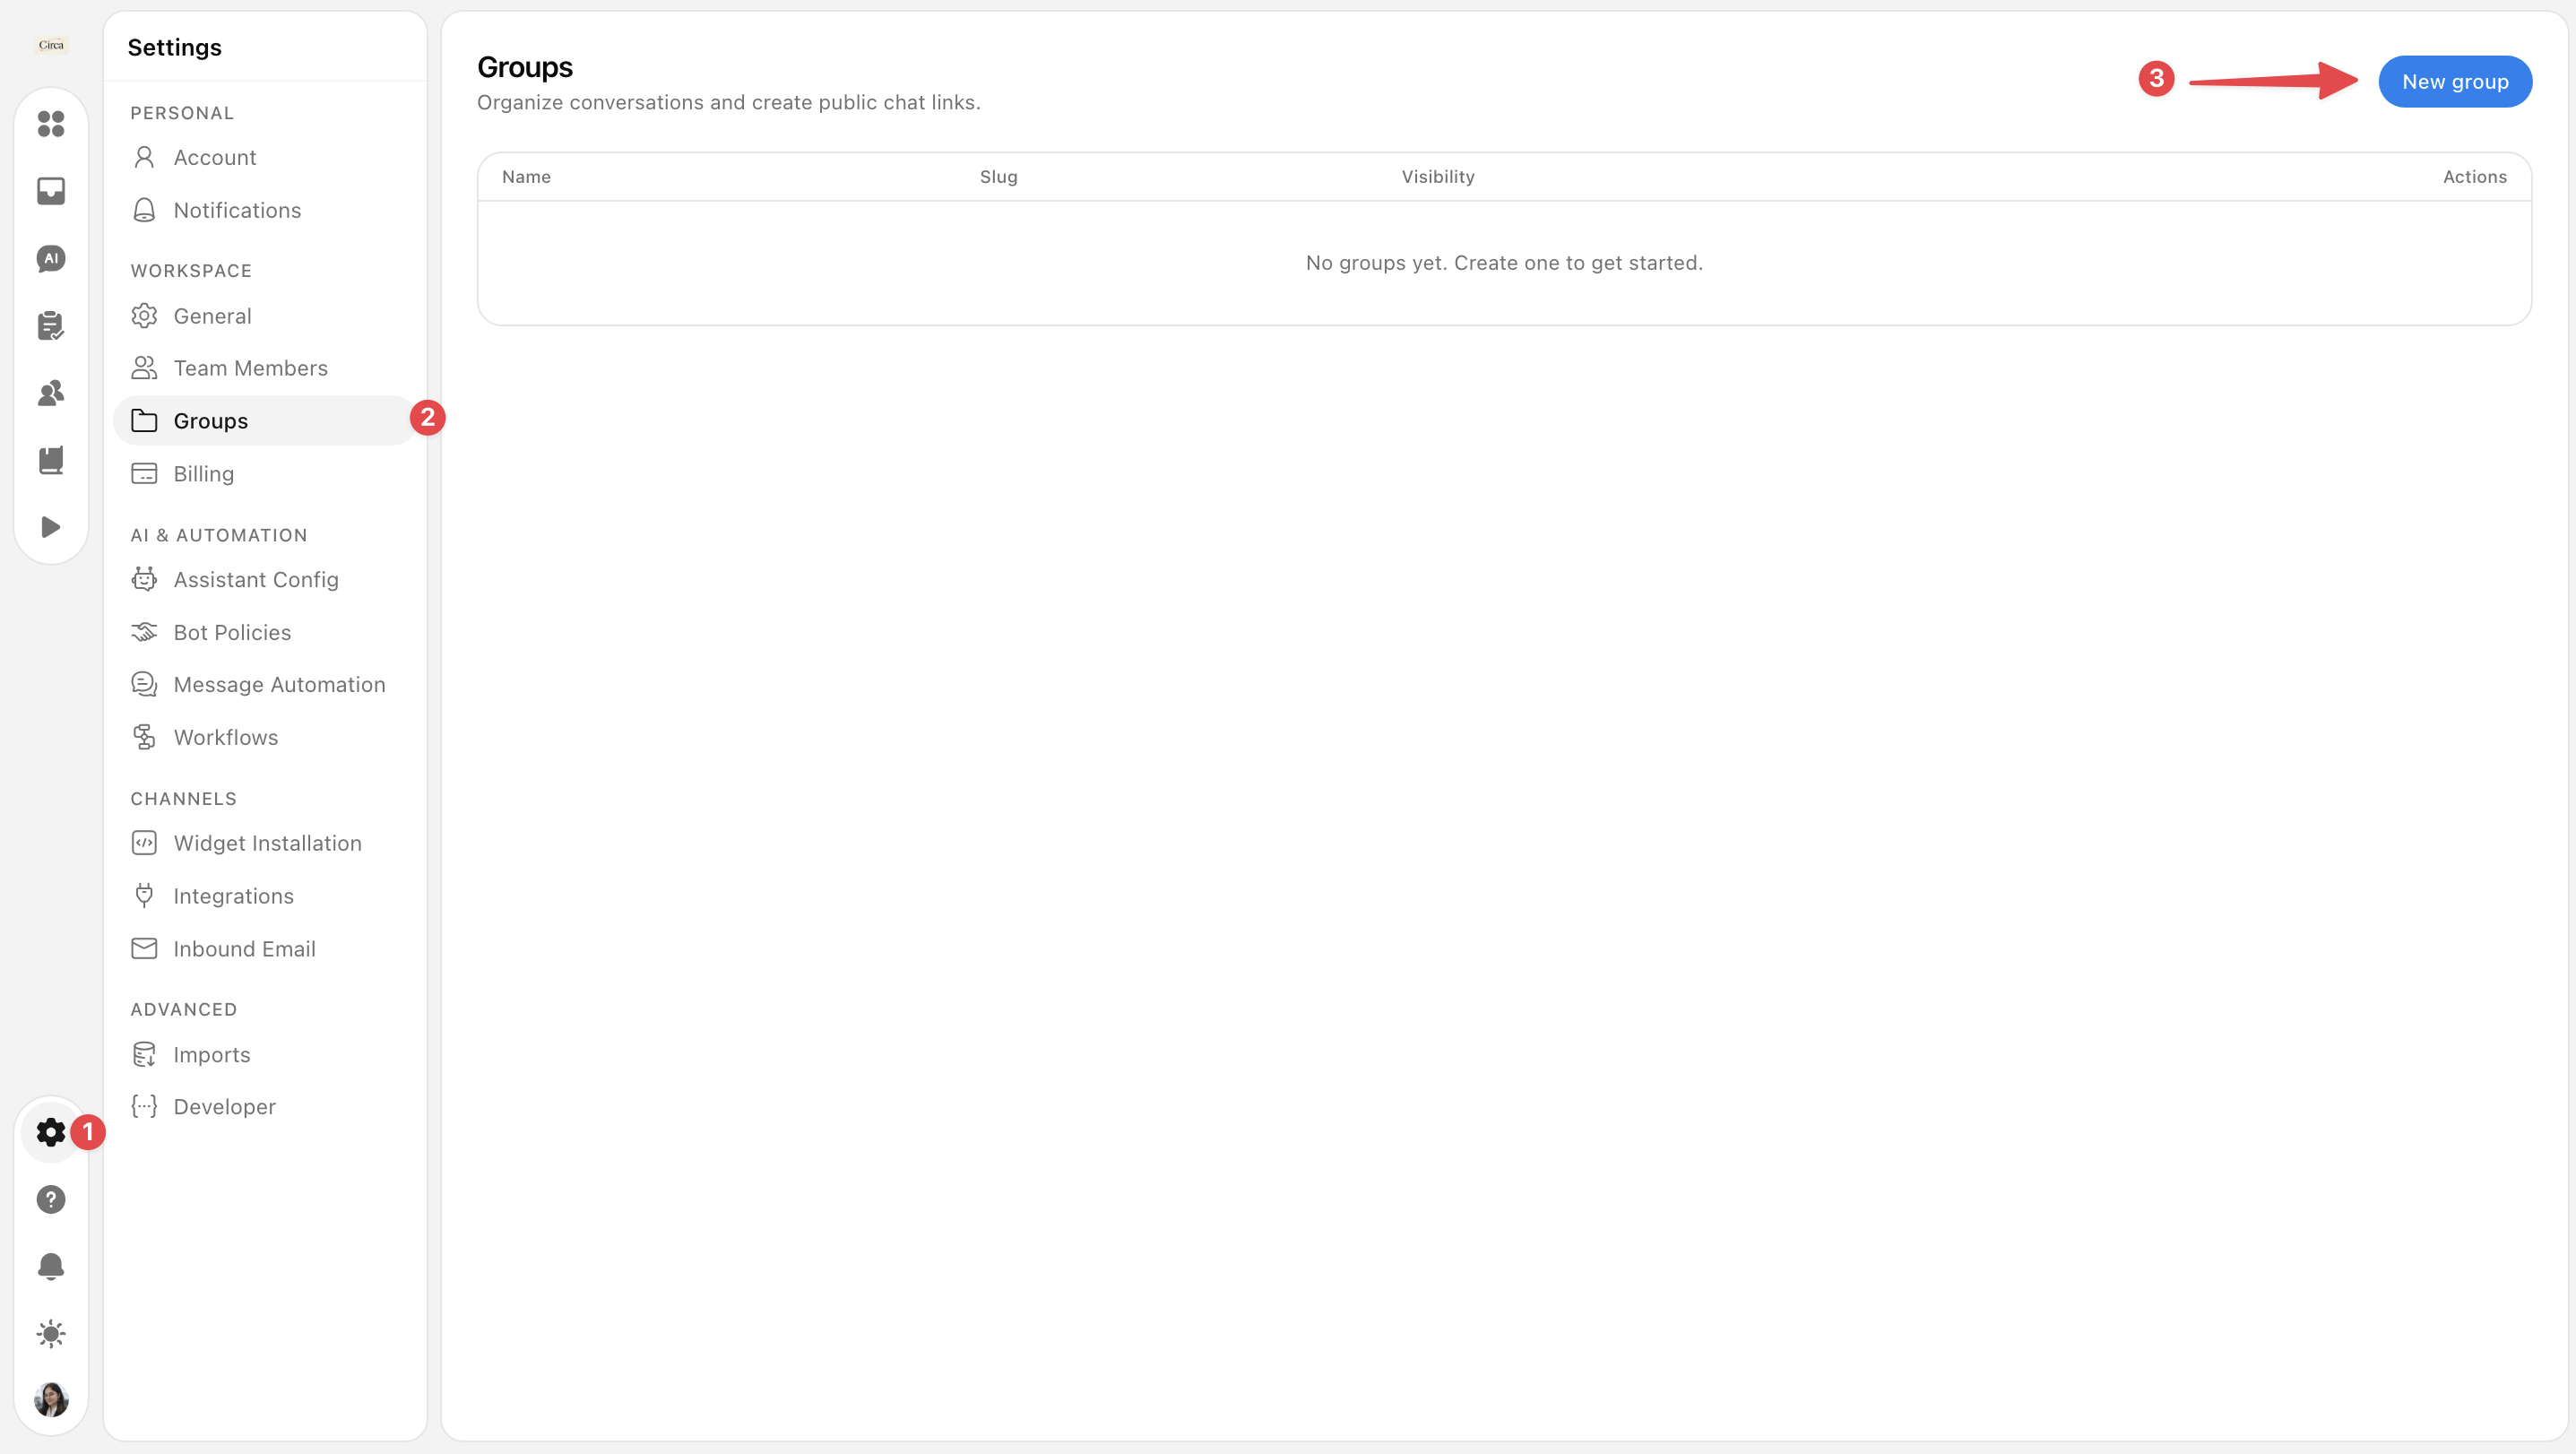
Understanding Group Settings
The Groups page allows you to organize internal workflows and set up external customer-facing entry points. When you click New group, a modal will appear where you can customize the following fields:
Name: Enter a clear, identifiable name for the group (e.g.,
SalesorTechnical Support).Slug: This is automatically generated based on your group name using lowercase letters, numbers, and hyphens (e.g.,
sales).Description: Add an optional description to outline what this group handles, helping your internal team understand its core purpose.
Color: Select a specific color indicator from the palette to visually tag and identify this group at a glance within your dashboard.
Public Link Toggle: Switch this on if you want to enable a public chat link for this group. When enabled, it provides a dedicated URL that you can share with customers so they can initiate conversations directly with this specific team.
Once you have filled out all the details, click the blue Create button to add the new group to your workspace. If you change your mind, you can click Cancel or the X icon to close the modal.
Managing Your Groups
On the main Groups dashboard, you can track and control all your configurations at a glance:
Internal Routing: Use your created groups to filter conversations, assign incoming tickets to specific teams, and keep your primary inbox organized.
Edit & Delete Groups: When you hover over an existing group in your list, options to edit or delete it will appear. You can quickly adjust settings or permanently remove a group to keep your workspace clean.
Need more help?
Reach out to our support at [email protected] or submit a request on our support board! 😃
Was this helpful?
Comments
You must be logged in to comment in this article.
Login to comment